Ingestion Guided Tour Pipeline
This interactive guide walks you through building an ingestion pipeline that reads from Azure Unity Catalog, uses Azure Blob Storage as an intermediate store, and runs on a Databricks compute environment. Use the tabs below to move between steps.
- 1. Prerequisites & create
- 2. Configuration
- 3. Map to domain
- 4. Schedule & Monitoring
- 5. Publish
Prerequisites
Complete the following setup in the Admin Console before creating the ingestion pipeline.
1. Admin project with repository association
Create a project linked to a GitHub or GitHub Enterprise repository. The repository stores pipeline definitions and version control metadata.
- See Add Project to create a new project with a GitHub repository link.
2. Databricks environment
Register a Databricks runtime environment. The ingestion pipeline will execute on this environment.
- See Databricks Environment to configure the Databricks environment.
3. Connections
Register the following two connections so the pipeline can read from Unity Catalog and write to Blob Storage.
| Connection | Purpose |
|---|---|
| Azure Blob Storage | Intermediate storage for staged data during ingestion. |
| Azure Unity Catalog | Source system to read tables and datasets from. |
- See Azure Blob Storage to add the Blob Storage connection.
- See Azure Unity Catalog to add the Unity Catalog connection.
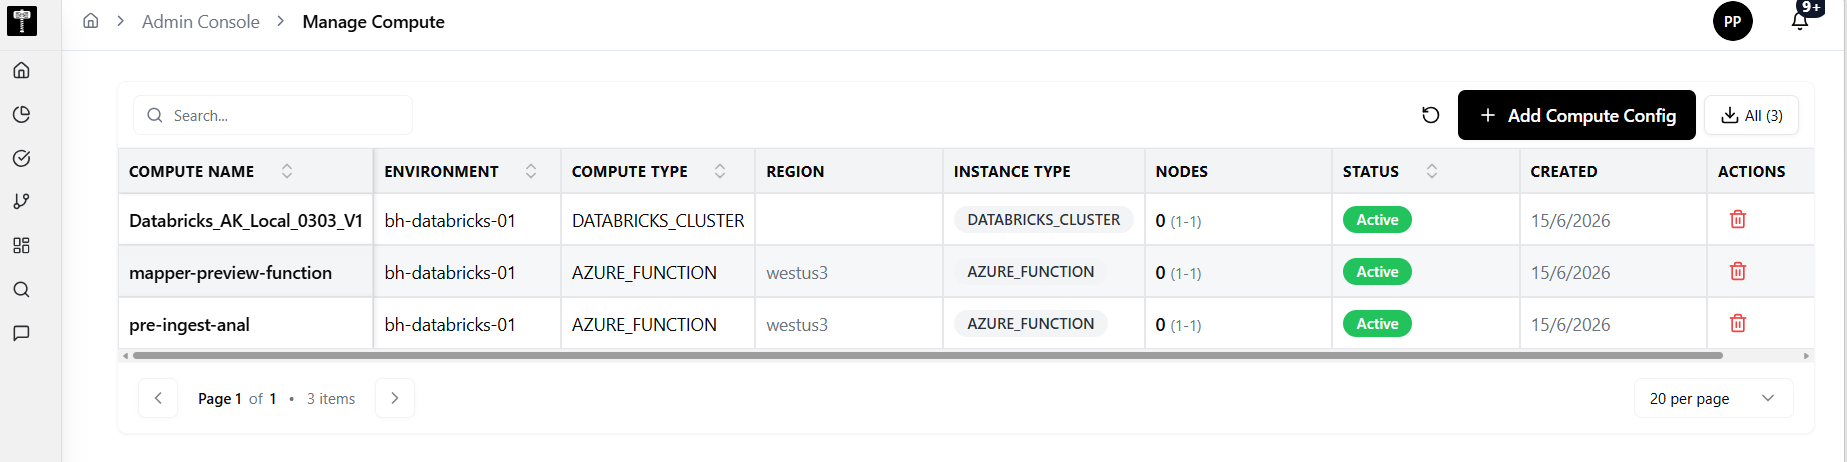
4. Compute
Add a Databricks compute resource that the pipeline will use for execution.
- See Compute to review and register compute resources.
5. Import data source via Data Catalog
Import the source tables into the Data Catalog so they are available for the ingestion pipeline.
- See Data Catalog to browse and import catalog tables.
Create a new ingestion
Once all prerequisites above are in place:
- Open the Ingestion list page.
- Select Add Ingestion.
- Choose the Databricks environment.
- Select the Azure Unity Catalog connection as the source.
- Pick the tables imported from the Data Catalog.
- Configure Azure Blob Storage as the target connection.
- Save and validate the configuration.
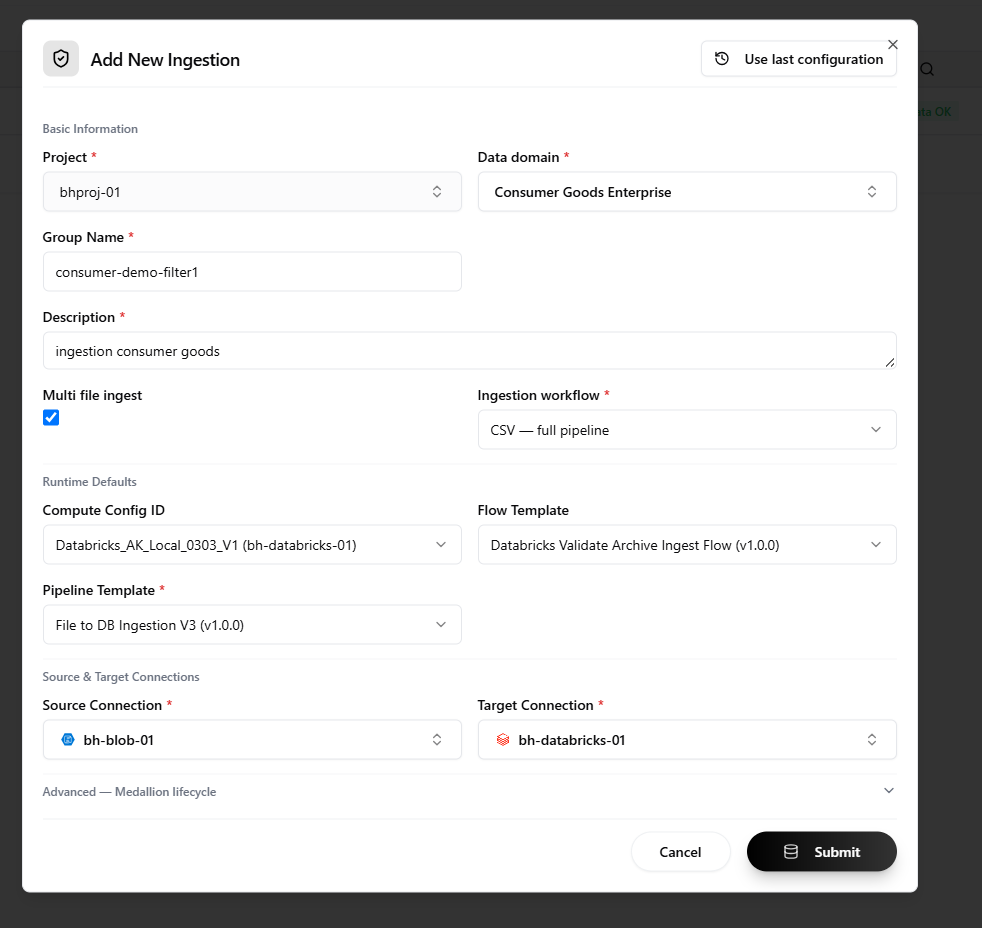
After creation, the ingestion pipeline appears in the list with stage Metadata OK.
After creating the ingestion pipeline, configure the pipeline settings in detail. Use the tabs below to navigate through the four configuration sections.
- 1. Basic configuration
- 2. Source configuration
- 3. Target & load
- 4. Review & advanced
Review and confirm the pipeline name, description, and assigned environment. The environment and compute resource selected here determine where the pipeline runs.Field reference
Field Description Pipeline Name A descriptive name for the ingestion pipeline. Description Optional notes about the pipeline purpose. Environment The Databricks environment registered in Admin (read-only if already chosen). Compute The compute resource the pipeline uses for execution.
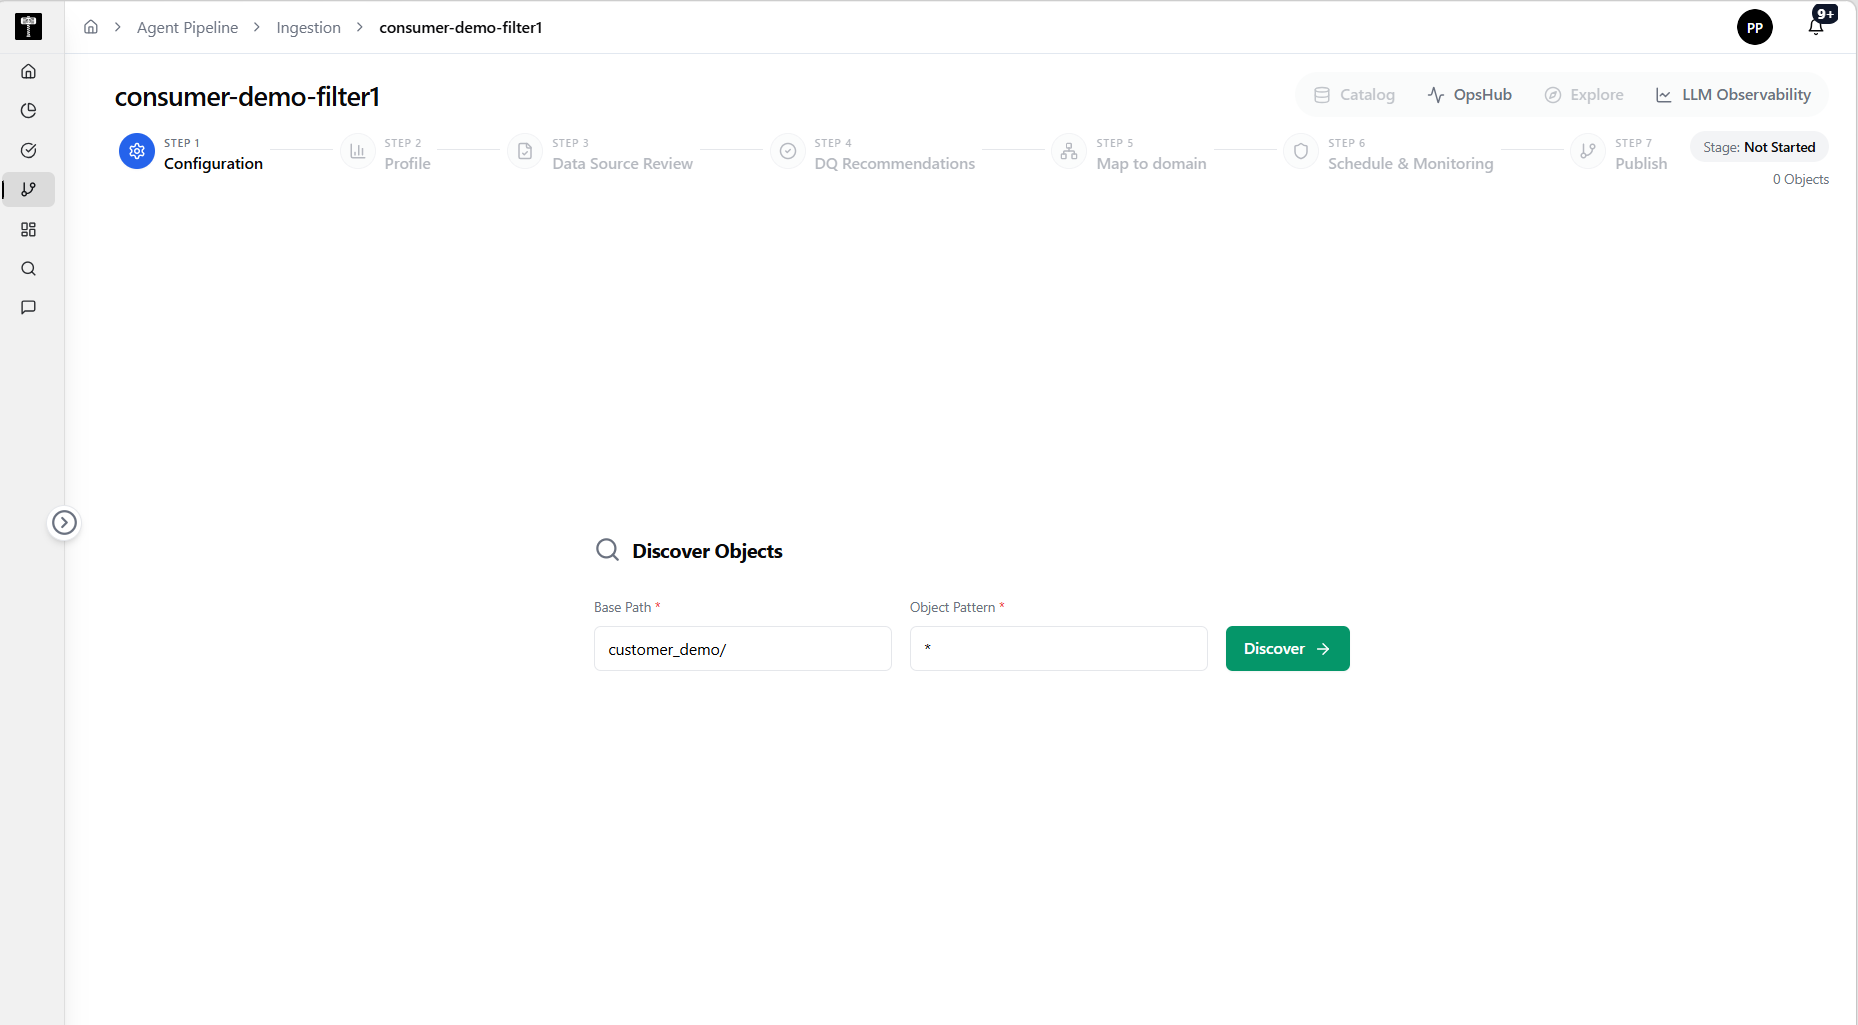
Define how the pipeline reads data from the Azure Unity Catalog source.Field reference
Field Description Source Connection The Azure Unity Catalog connection (read-only if already chosen). Schema / Database The schema or database containing the tables to ingest. Tables The specific tables selected from the Data Catalog import. Column Selection Choose all columns or a subset for ingestion. Filter Condition Optional SQL WHERE clause to filter rows at source.
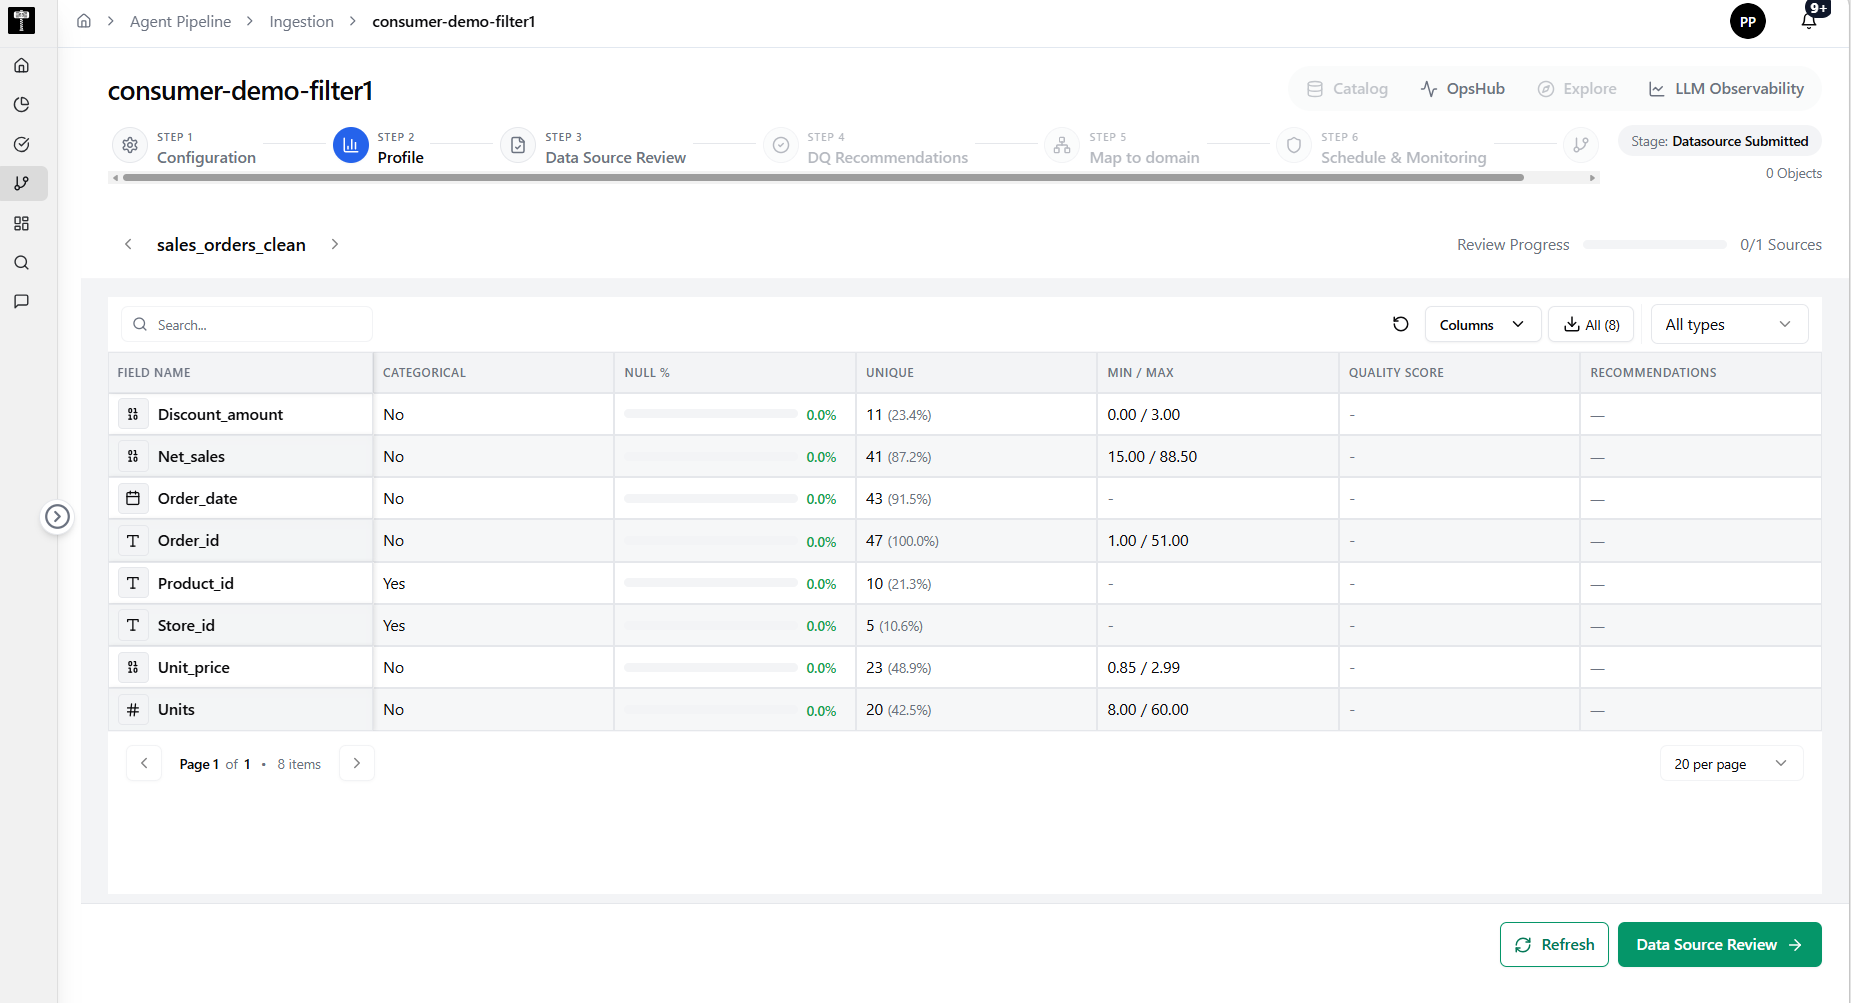
Configure how the data is written to Azure Blob Storage and the load strategy.Field reference
Field Description Target Connection The Azure Blob Storage connection (read-only if already chosen). Target Path / Container The Blob Storage container and folder path for the output. Load Strategy Full Load — Replace existing data on every run. Incremental — Append only new or changed records based on a watermark column. Staging Location Intermediate staging path used during the ingestion process. File Format Output format such as Parquet, Delta, or CSV. Partition Columns Optional columns to partition the output for query performance.
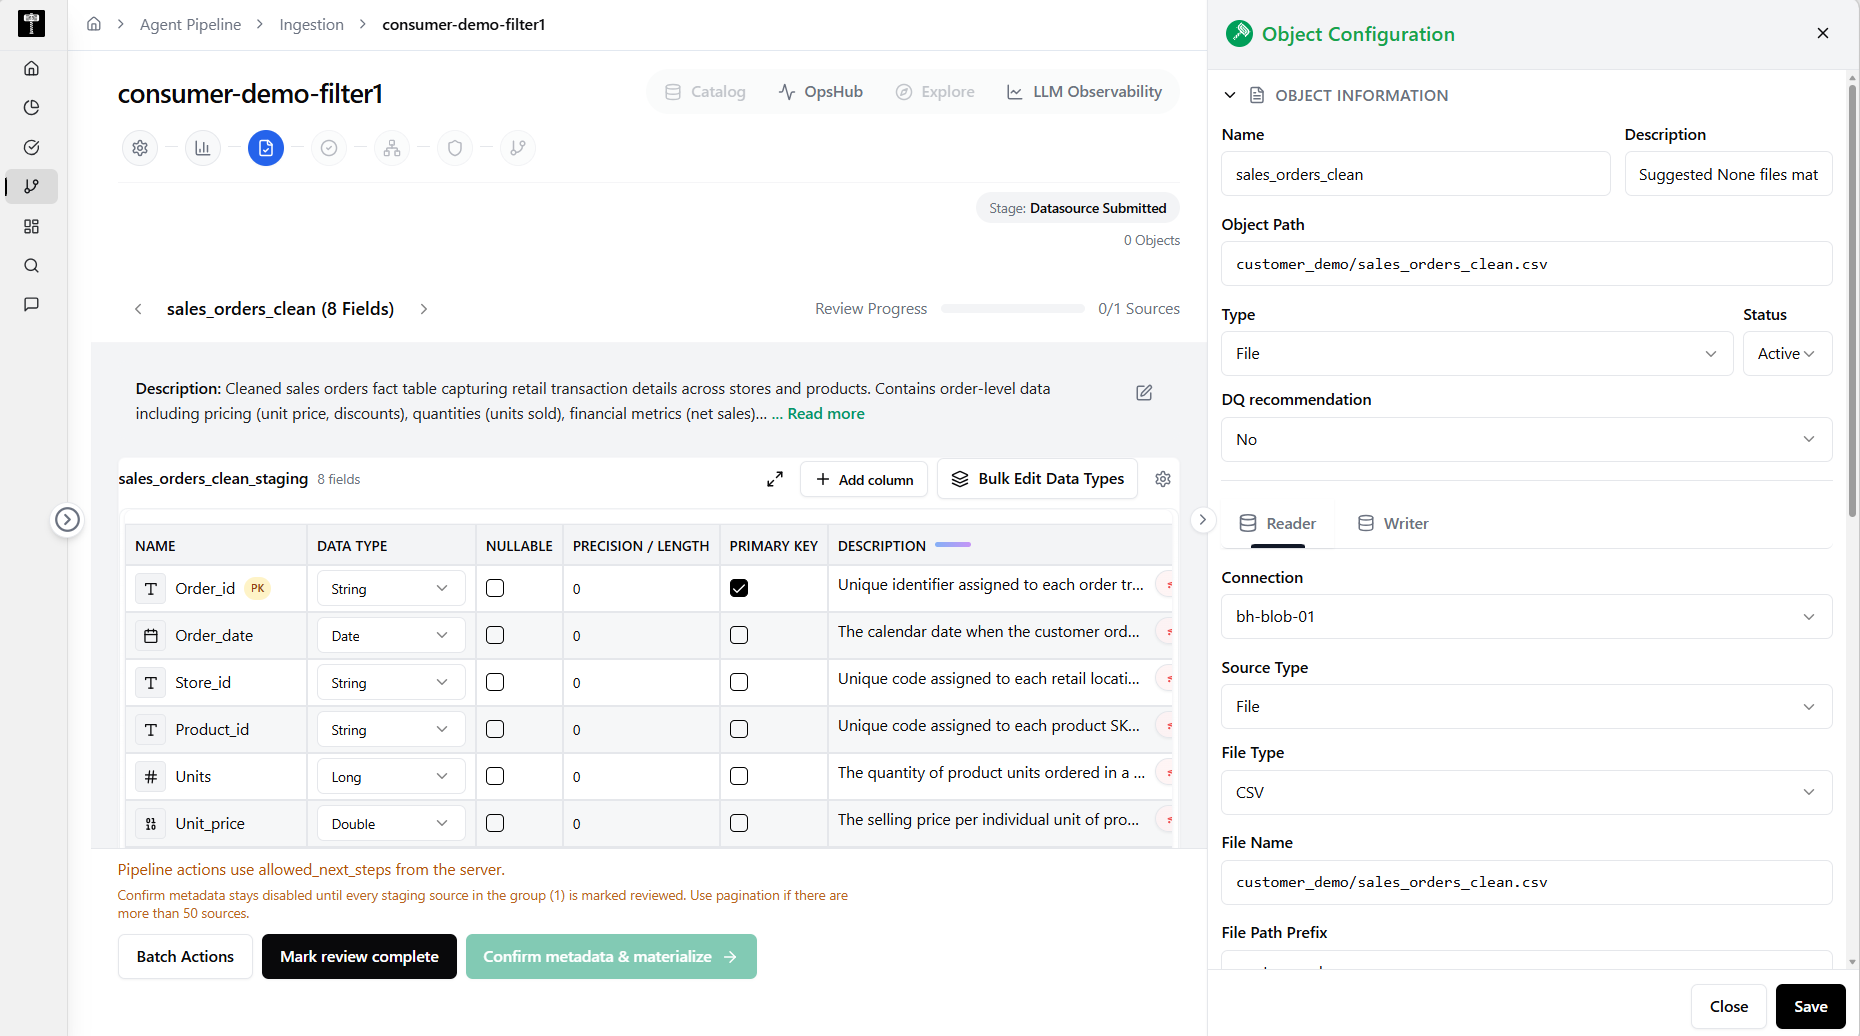
Review the complete configuration before saving. Additional options include data quality checks, notification settings, and schedule confirmation.Field reference
Field Description Data Quality Rules Enable pre-ingestion data quality validation. Notifications Email or webhook alerts on success or failure. Schedule Preview Confirm the schedule configured in the next step. Enable Pipeline Activate the pipeline immediately after publish.
Select Save Configuration to persist the settings.
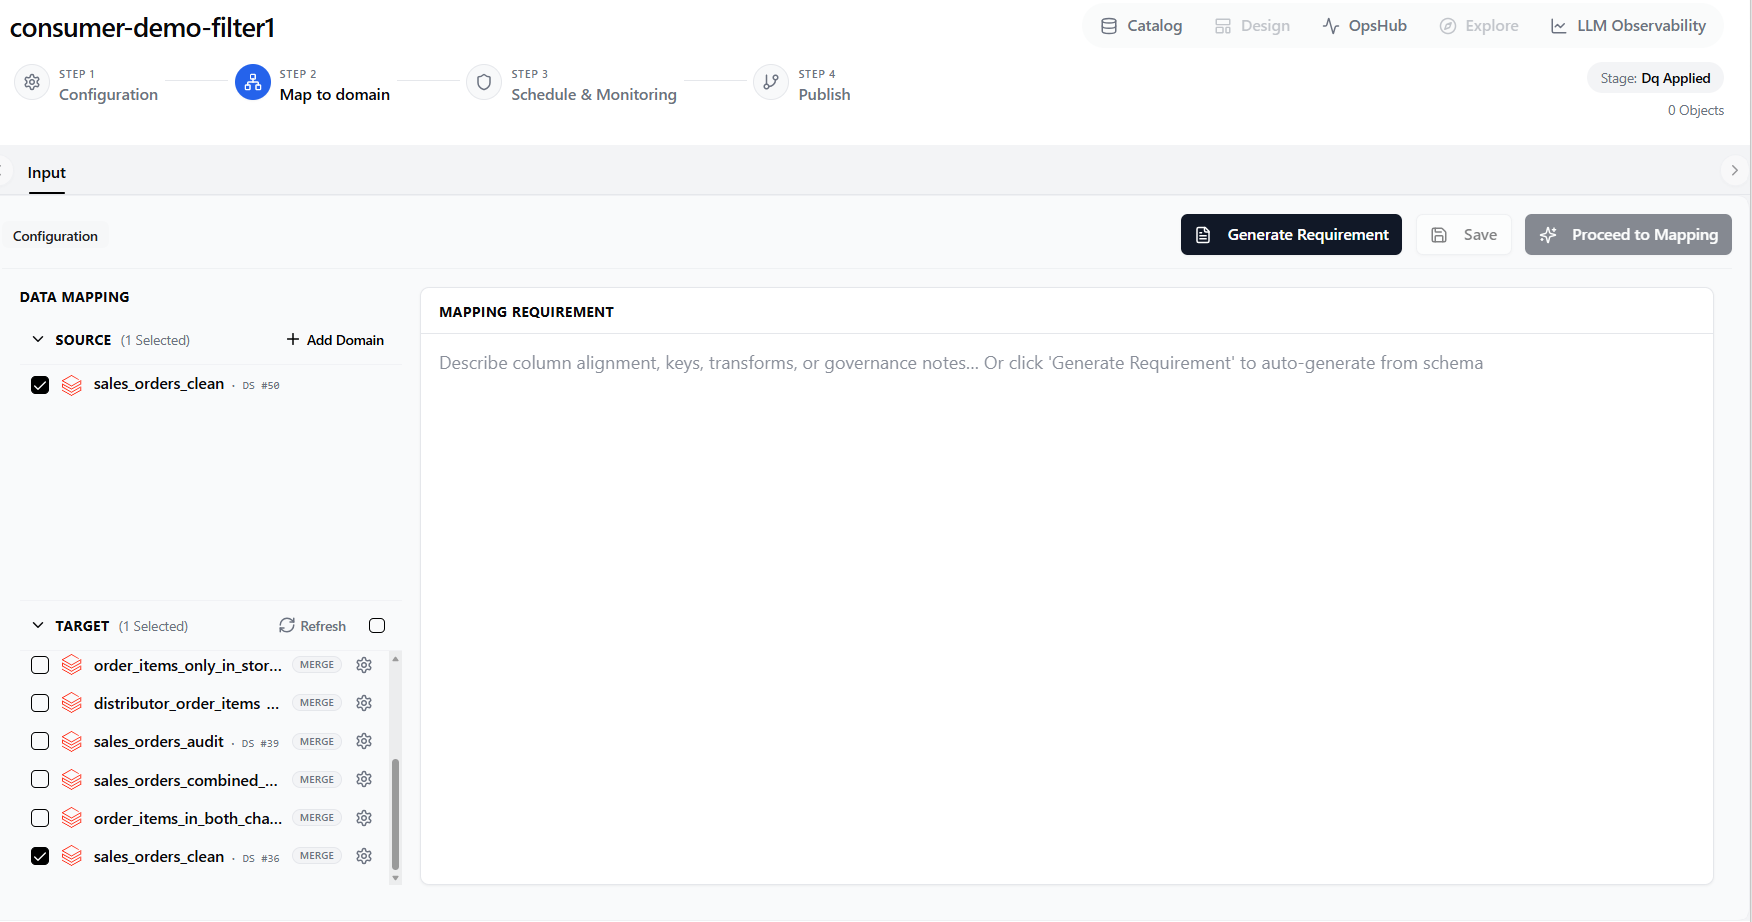
The configuration is saved and the pipeline stage updates to Configuration OK.
After configuring the pipeline, map the ingested data to a Data Gov domain so it is discoverable and governed. Use the tabs below to navigate through the four mapping tabs.
- 1. Input
- 2. Requirement
- 3. Designer
- 4. Test
Start by selecting the domain and identifying the input fields from the ingested source that will be mapped.Field reference
Field Description Domain The Data Gov domain to map the ingested data into. Source Table The ingested table that provides the input fields. Input Fields The columns from the source table available for domain mapping.
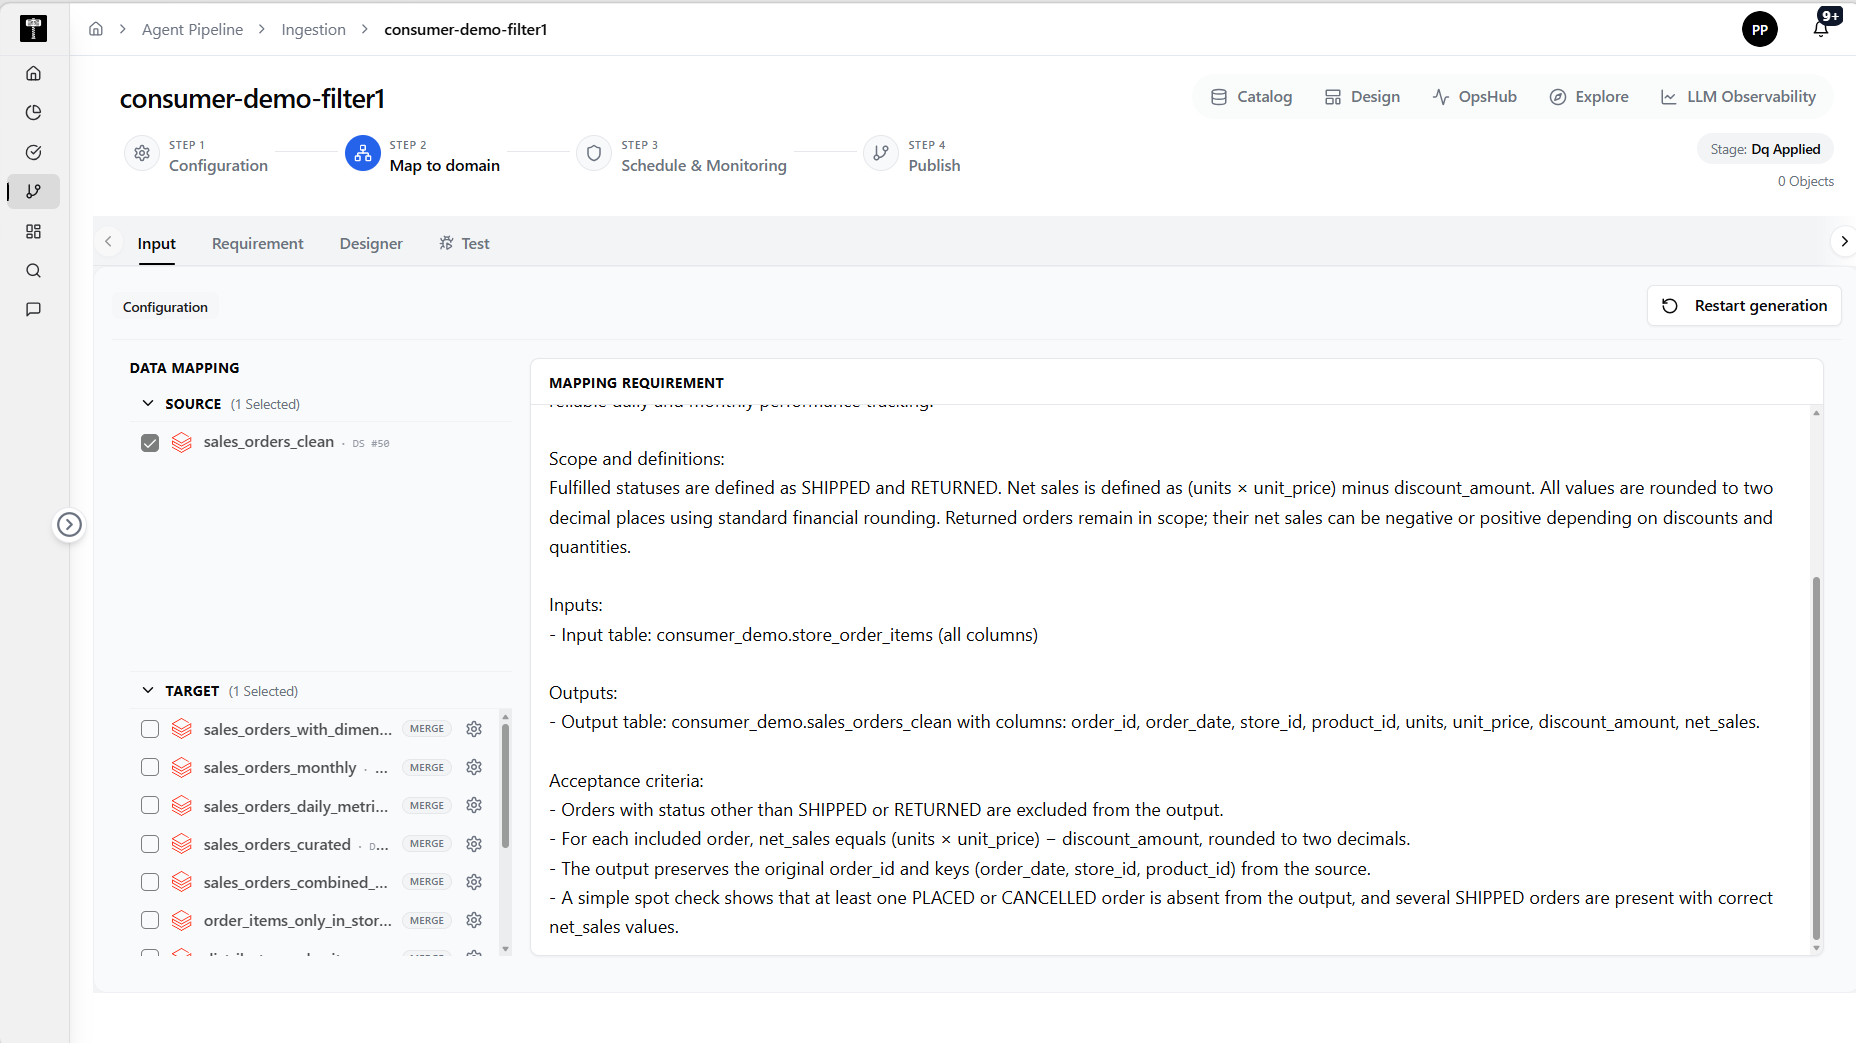
Define the business or technical requirements that the domain mapping must satisfy. Requirements act as validation rules for the mapped data.Field reference
Field Description Requirement Name A label for the mapping requirement. Description What the mapping must achieve (e.g., lineage, ownership, classification). Validation Type Rule type such as completeness, uniqueness, or referential integrity.
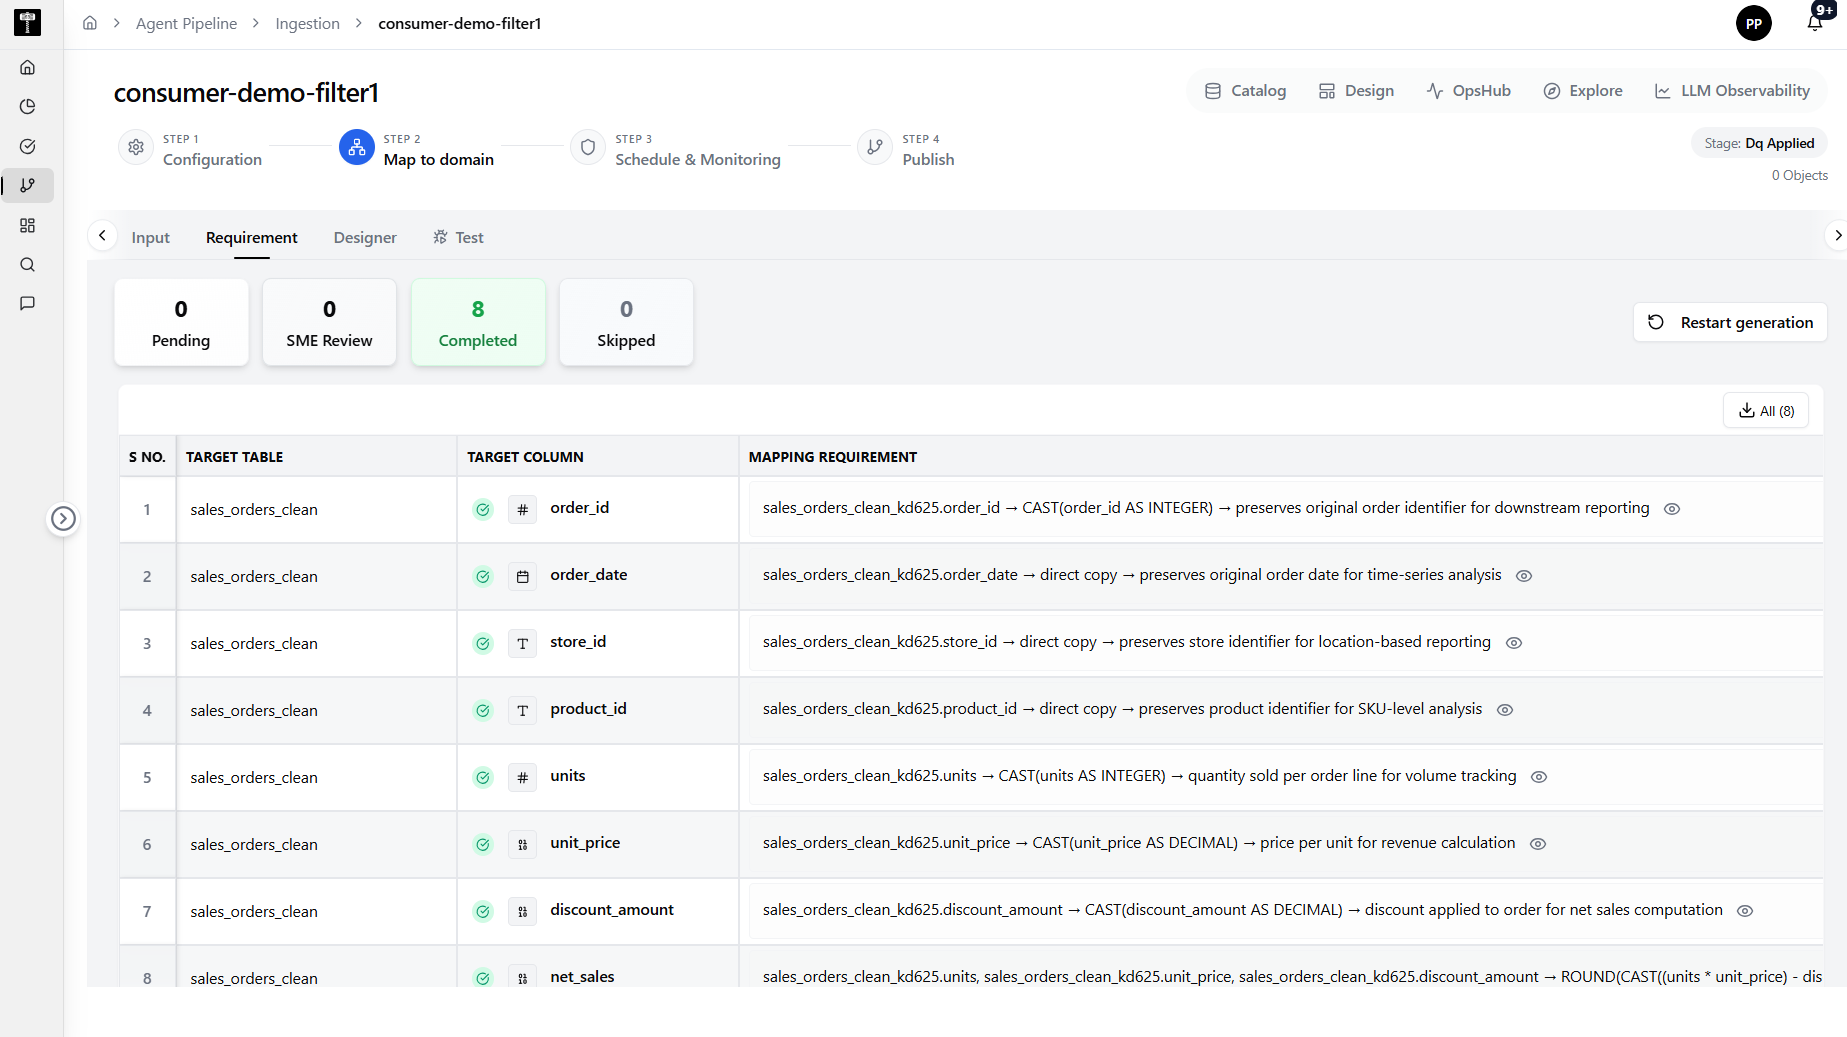
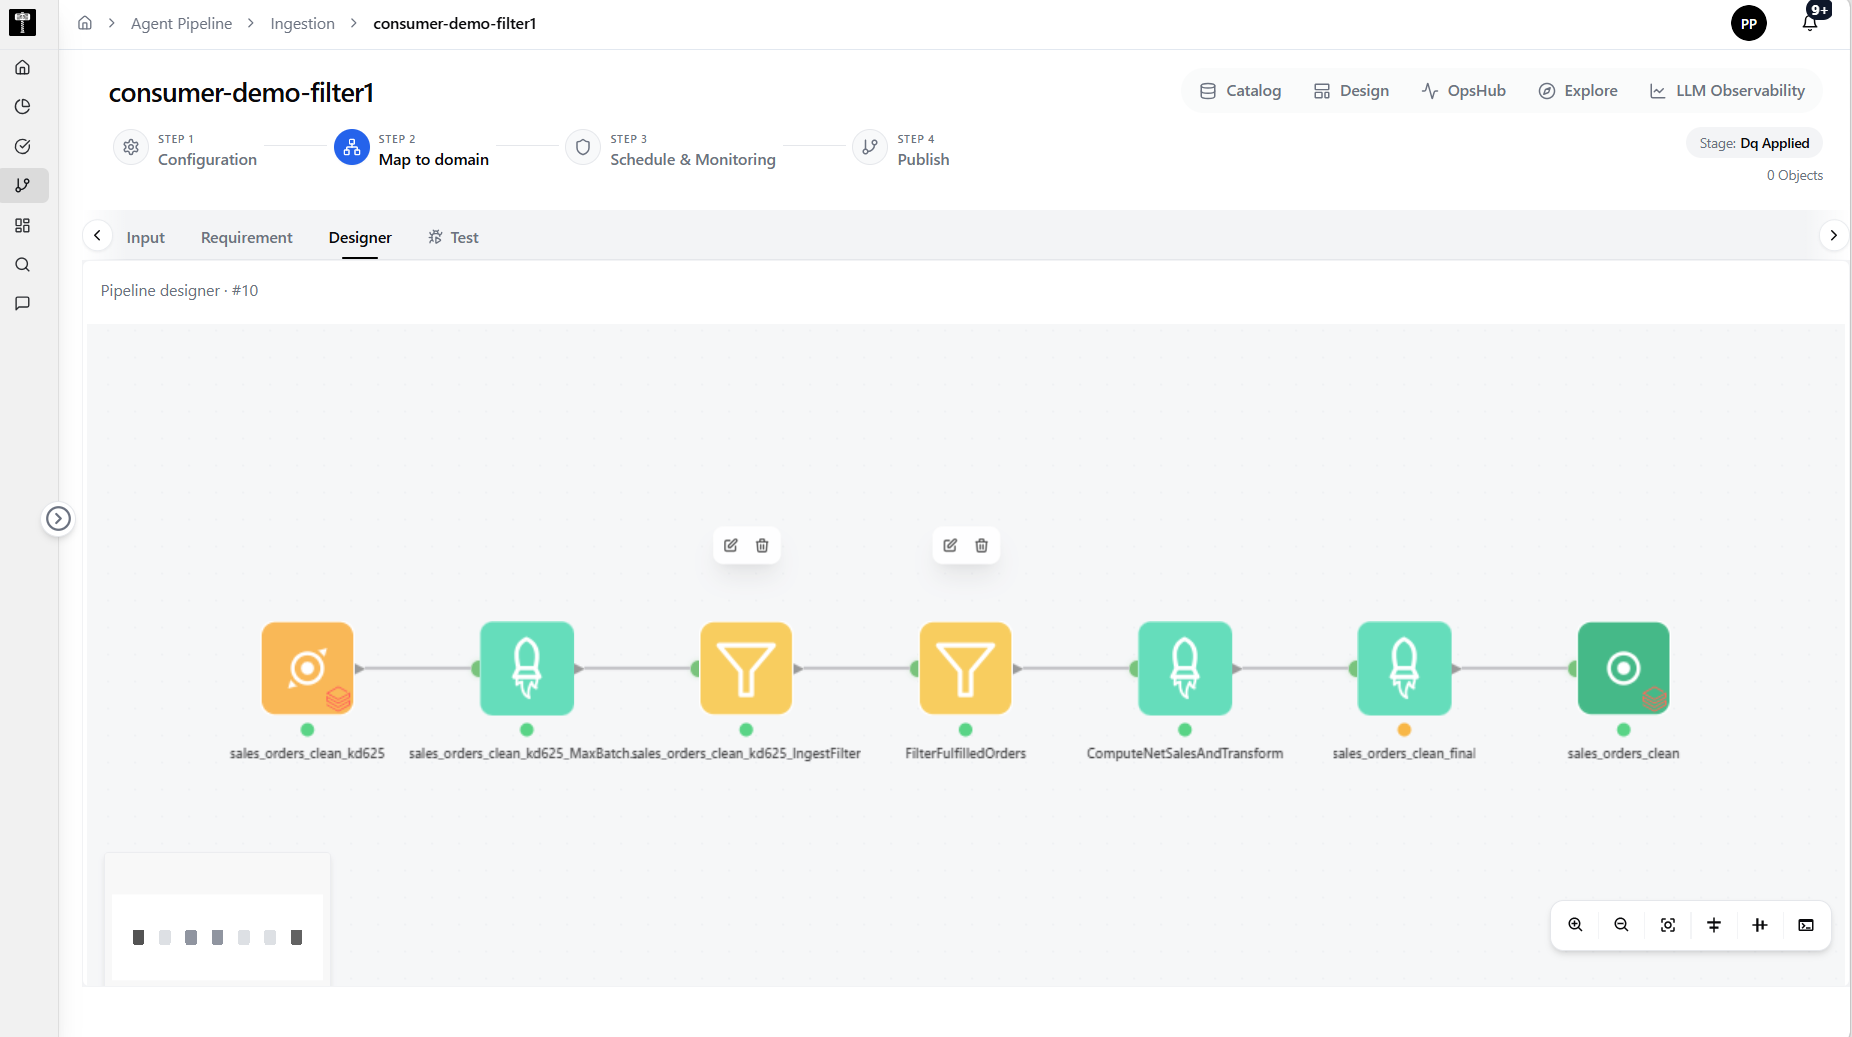
Use the visual designer to map source fields to domain attributes. Drag and drop fields or use the mapping grid to create the relationships.Field reference
Field Description Source Field The column from the ingested table. Domain Attribute The target attribute in the Data Gov domain. Transformation Optional expression or lookup to transform the value before mapping. Is Primary Key Mark if the field is a business key for the domain entity.
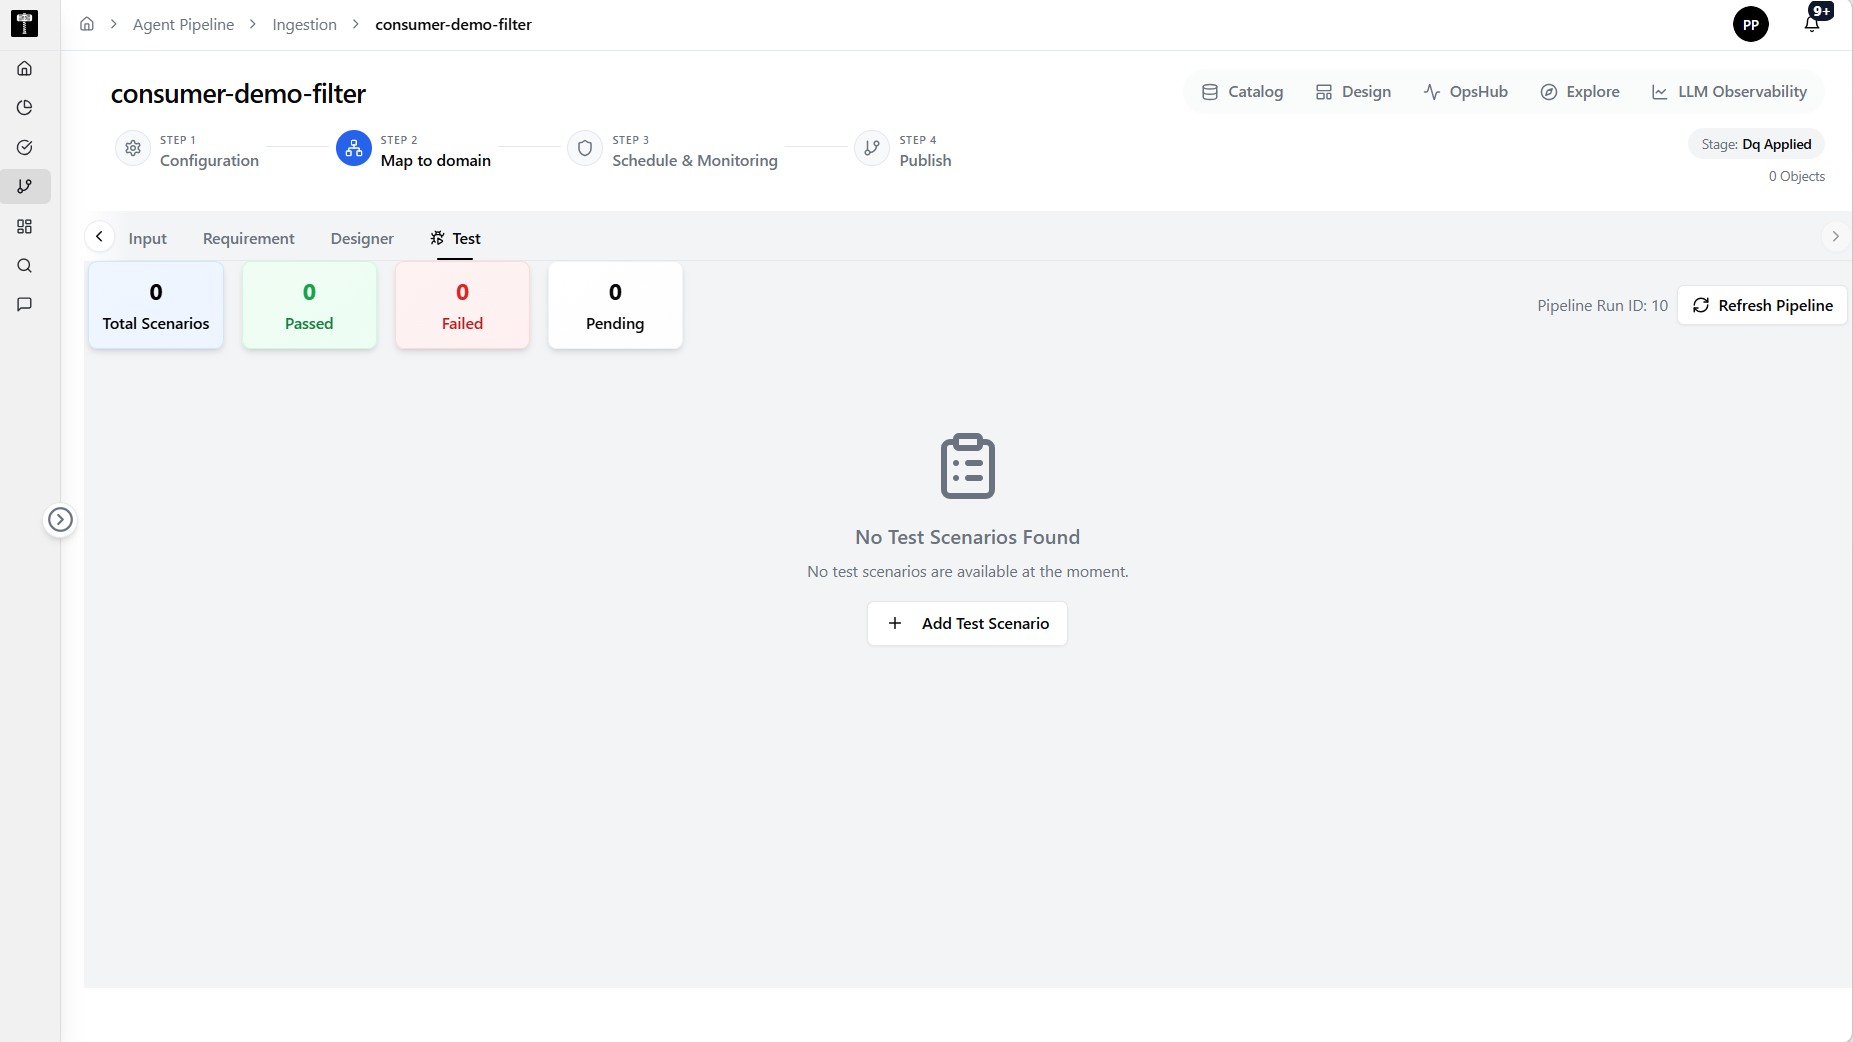
Run validation tests to confirm the mapping works correctly against sample data before saving.Field reference
Field Description Test Name Identifier for the validation test. Test Query The query or rule used to validate the mapped output. Expected Result The expected outcome (pass criteria). Test Status Result of the last test run — Pass or Fail.
Select Save Mapping to persist the domain mapping.
The mapping is saved and the pipeline stage updates to Domain Mapping OK.
After mapping the data to a domain, configure when the pipeline runs and how its health is monitored. Use the tabs below to navigate through the four sections.
- 1. Feed identity
- 2. Schedule
- 3. Controls
- 4. Alerts
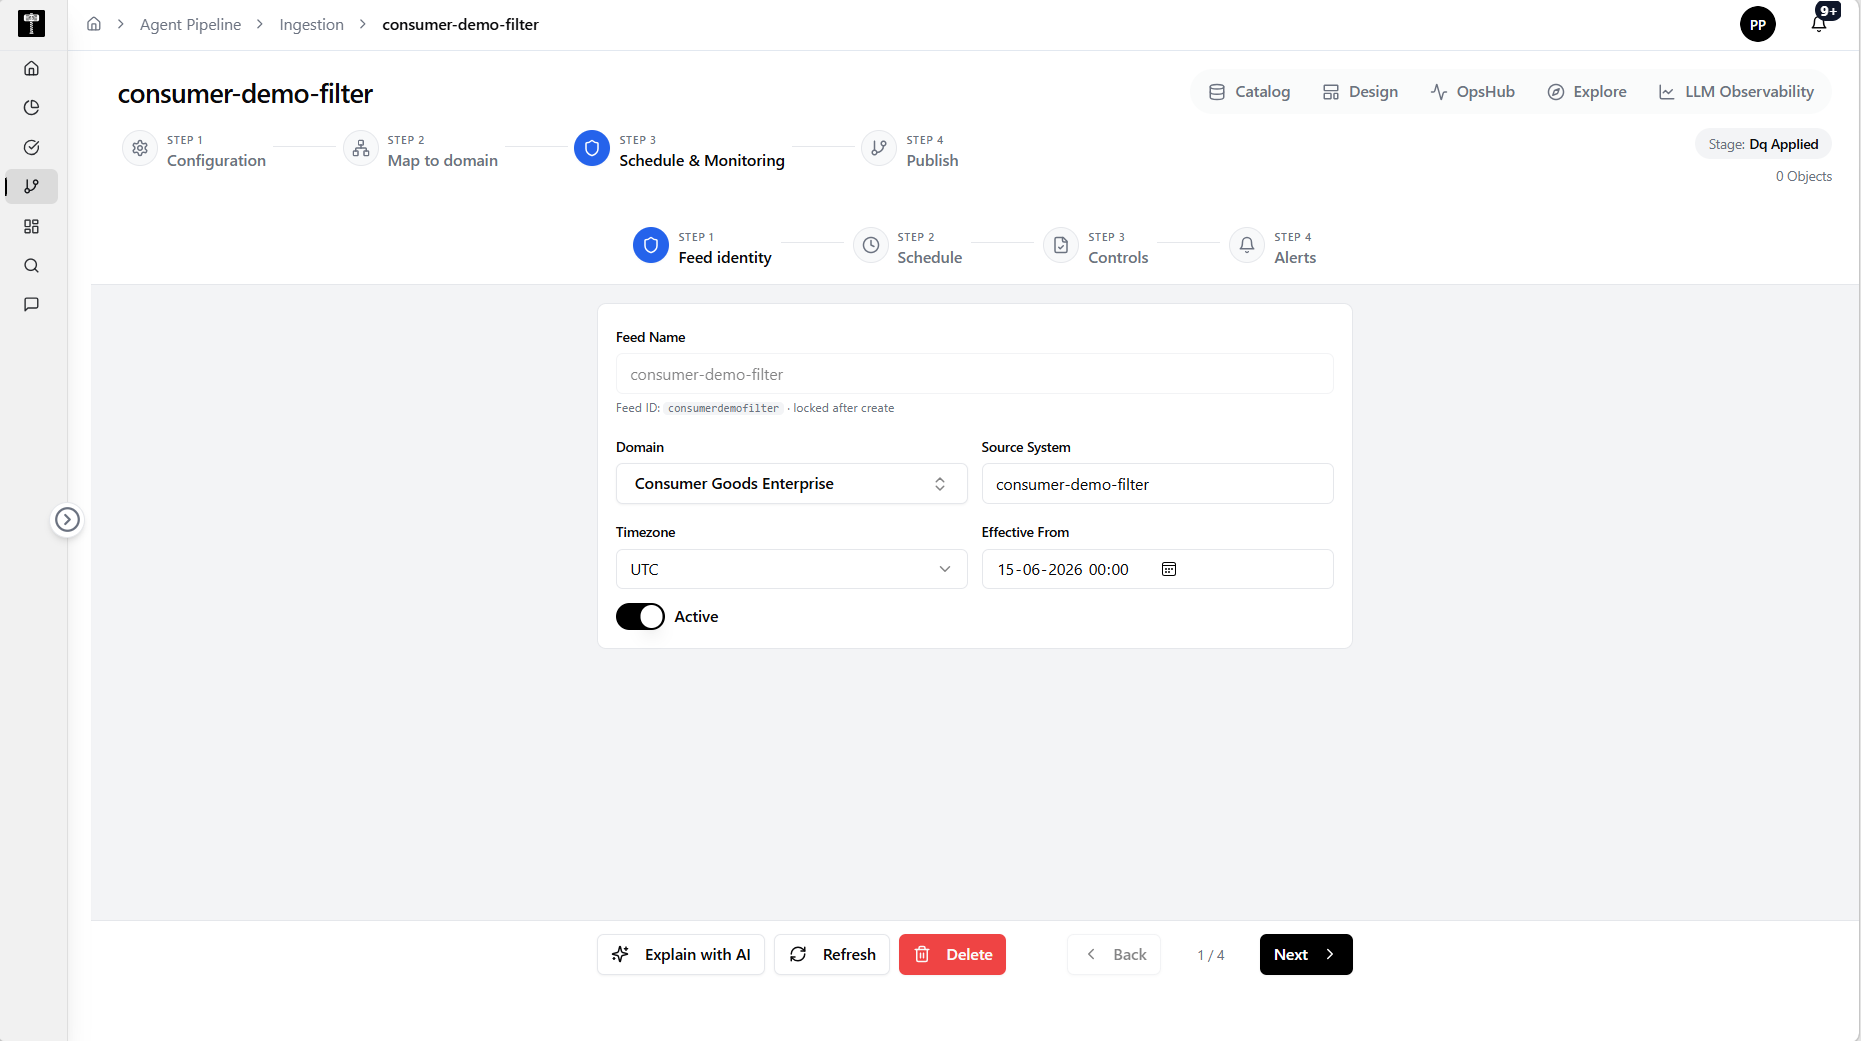
Define the pipeline identity, owner, and metadata used for discovery and governance.Field reference
Field Description Feed Name The display name of the ingestion feed. Owner The user or team responsible for the pipeline. Description Purpose of the feed for documentation and search. Tags Labels for categorization and filtering in the pipeline list. Data Classification Sensitivity level such as public, internal, or restricted.
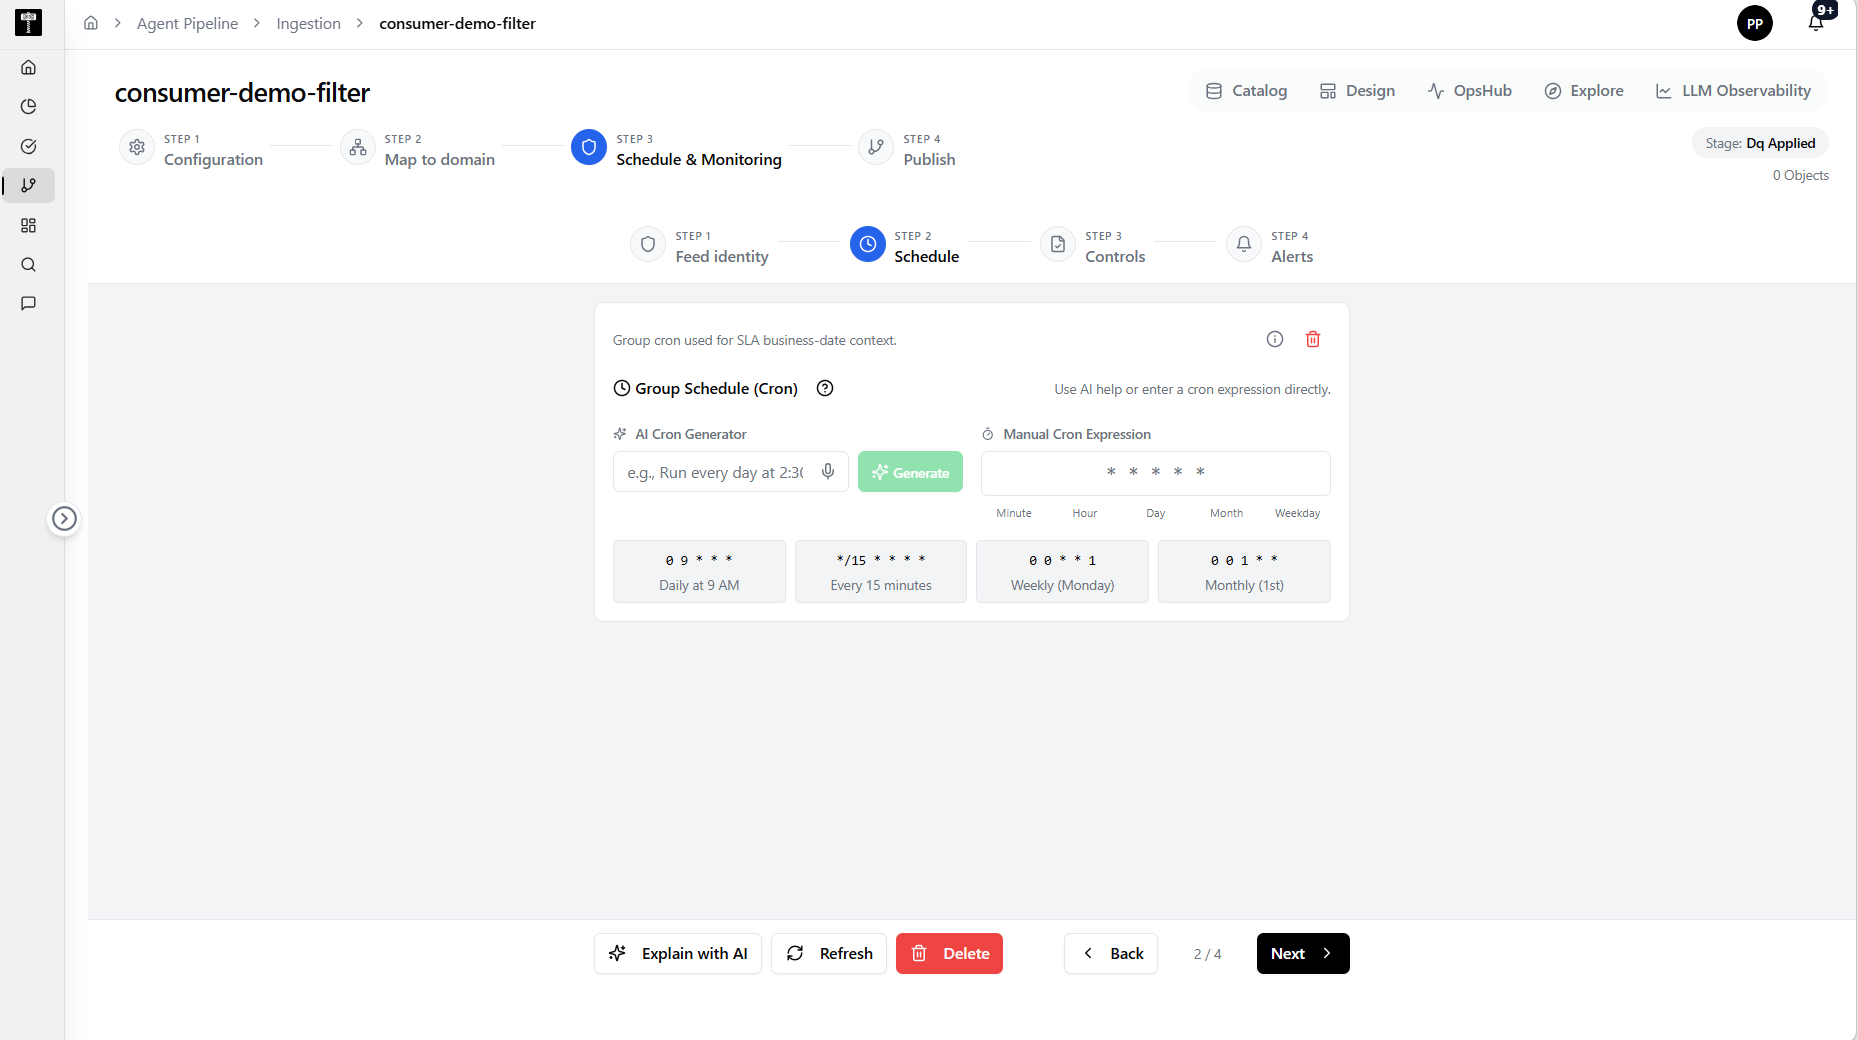
Set the execution schedule so the pipeline runs automatically at the desired cadence.Field reference
Field Description Frequency How often the pipeline runs — Once, Hourly, Daily, Weekly, or Custom. Start Time The date and time the schedule becomes active. Timezone The timezone used for scheduling. End Date Optional date when the schedule stops running. Cron Expression Advanced users can provide a custom cron schedule.
Configure execution controls that govern pipeline behavior during runs.Field reference
Field Description Parallelism Number of tasks that can run concurrently. Retry Policy Number of automatic retries on failure and the delay between them. Timeout Maximum duration a pipeline run is allowed before it is terminated. Enable Backfill Allow the pipeline to backfill missed runs when it resumes. Stop on Error Halt subsequent tasks if any task fails.
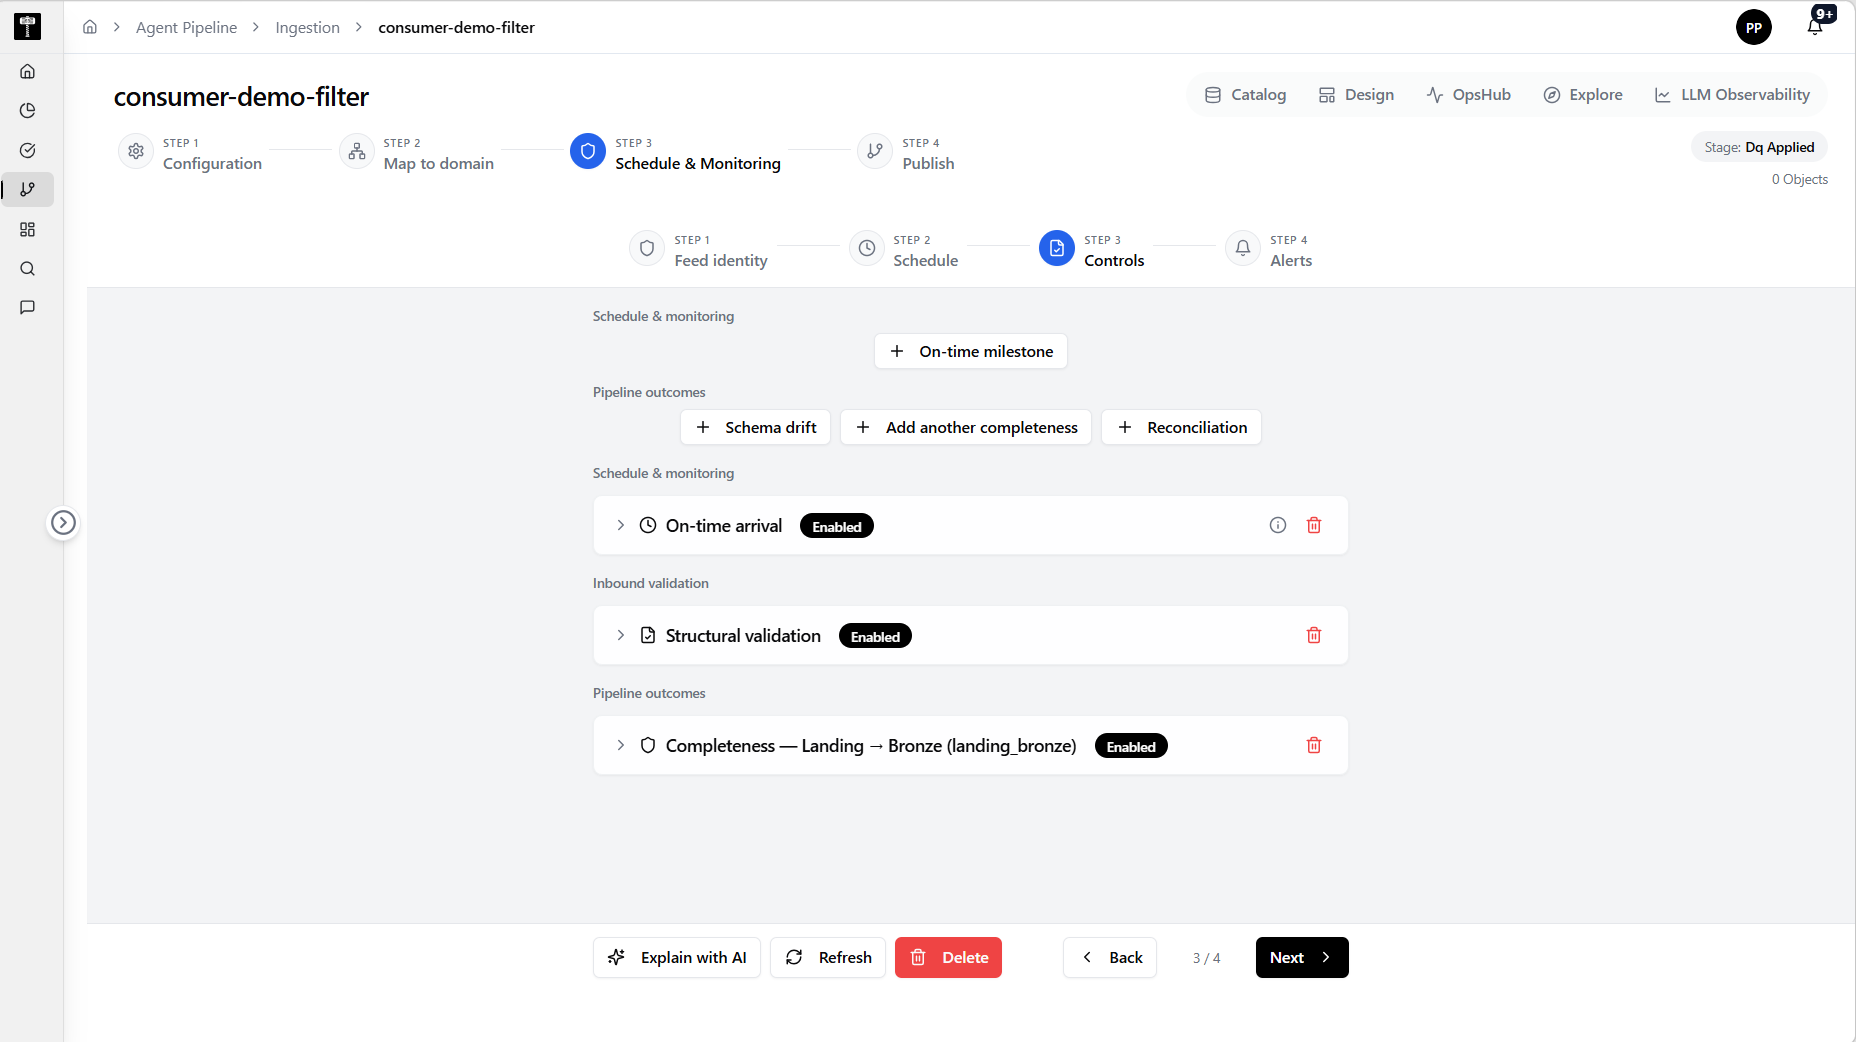
Set up notifications so the team is informed of pipeline events and failures.Field reference
Field Description Alert On Events to alert on — Success, Failure, Start, or Timeout. Email Recipients Comma-separated list of email addresses to notify. Webhook URL Optional endpoint to POST event payloads for integration with external systems. Slack Channel Optional Slack channel to send alert messages. Alert Frequency How often repeated alerts are sent to avoid noise.
Select Save Schedule & Monitoring to apply the settings.
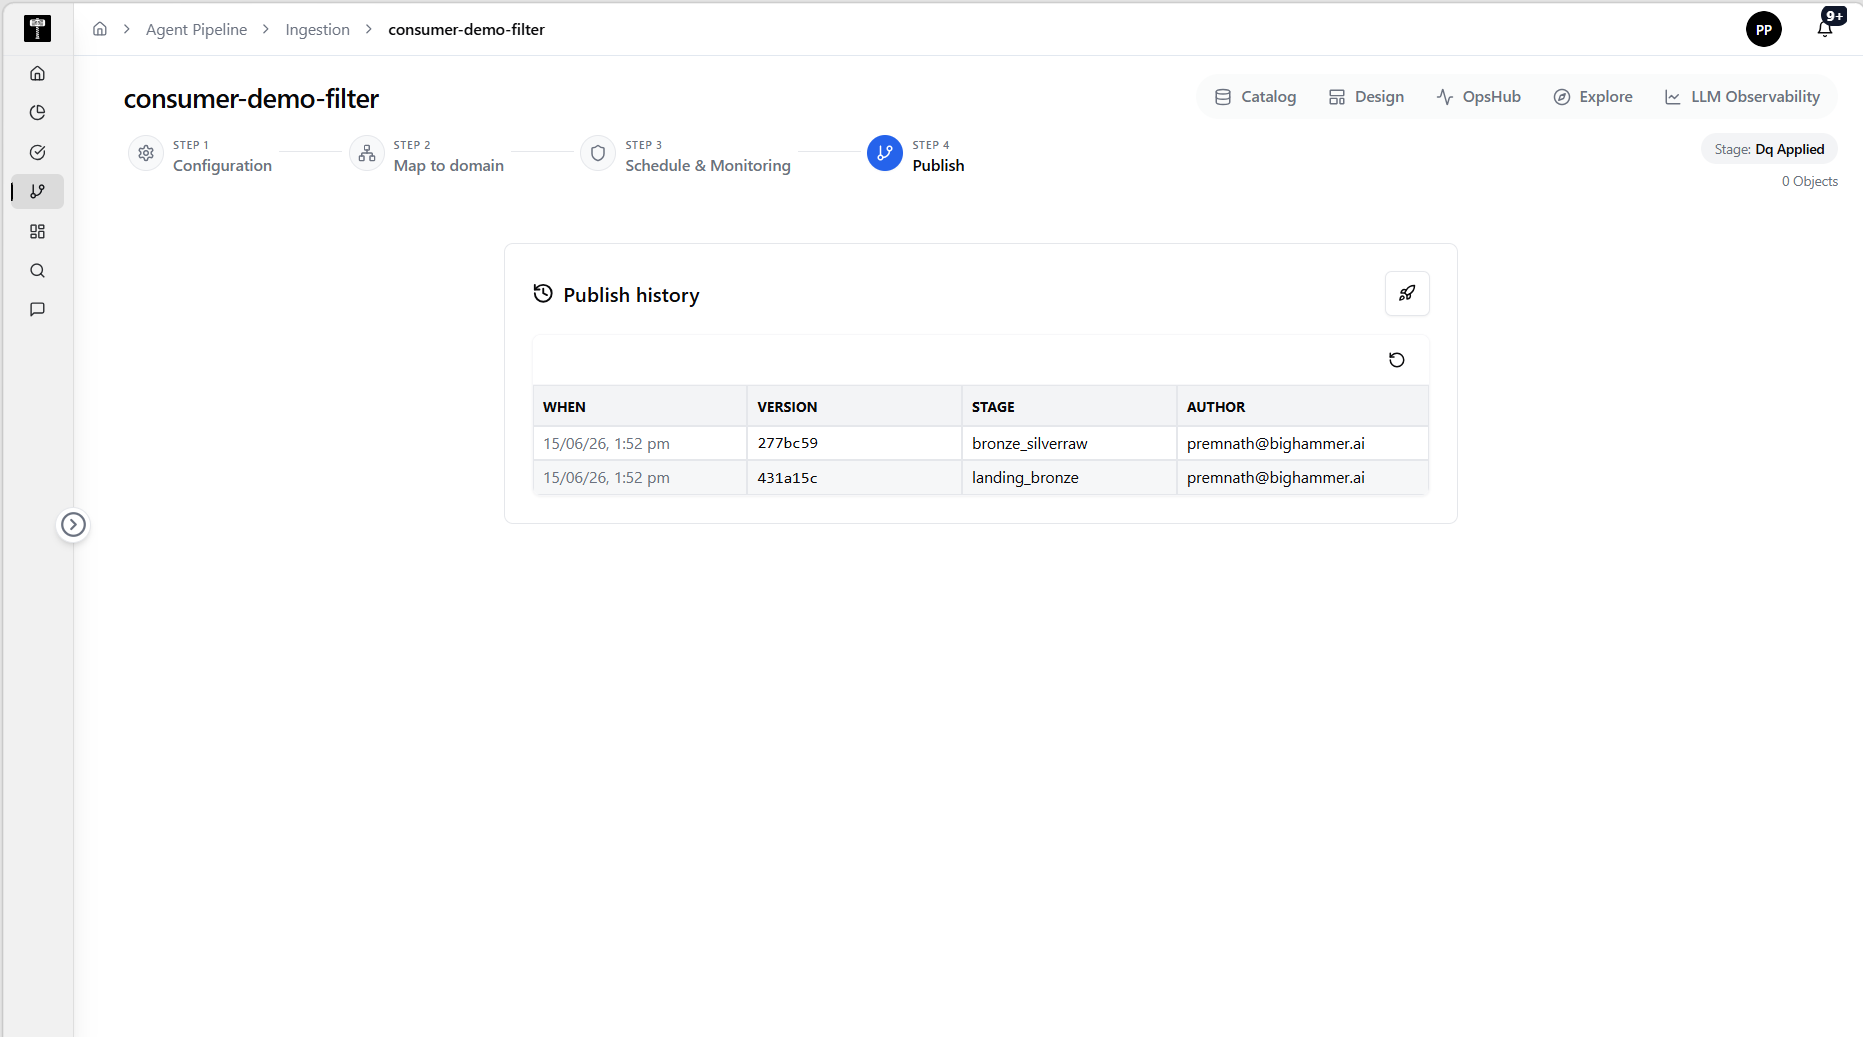
The schedule and monitoring configuration is saved and the pipeline stage updates to Schedule OK.
After completing configuration, domain mapping, and schedule setup, review the full pipeline summary and publish it to activate execution.
Review before publish
The publish page displays a consolidated view of everything configured across all steps. Review each section before activating the pipeline.
| Section | What to check |
|---|---|
| Pipeline Details | Name, owner, group, domain, and current status (Draft). |
| Pipeline Configuration | Source connection, target connection, load strategy, and file format. |
| Domain Mapping | Mapped fields, transformations, and test status. |
| Schedule | Frequency, start time, and enabled state. |
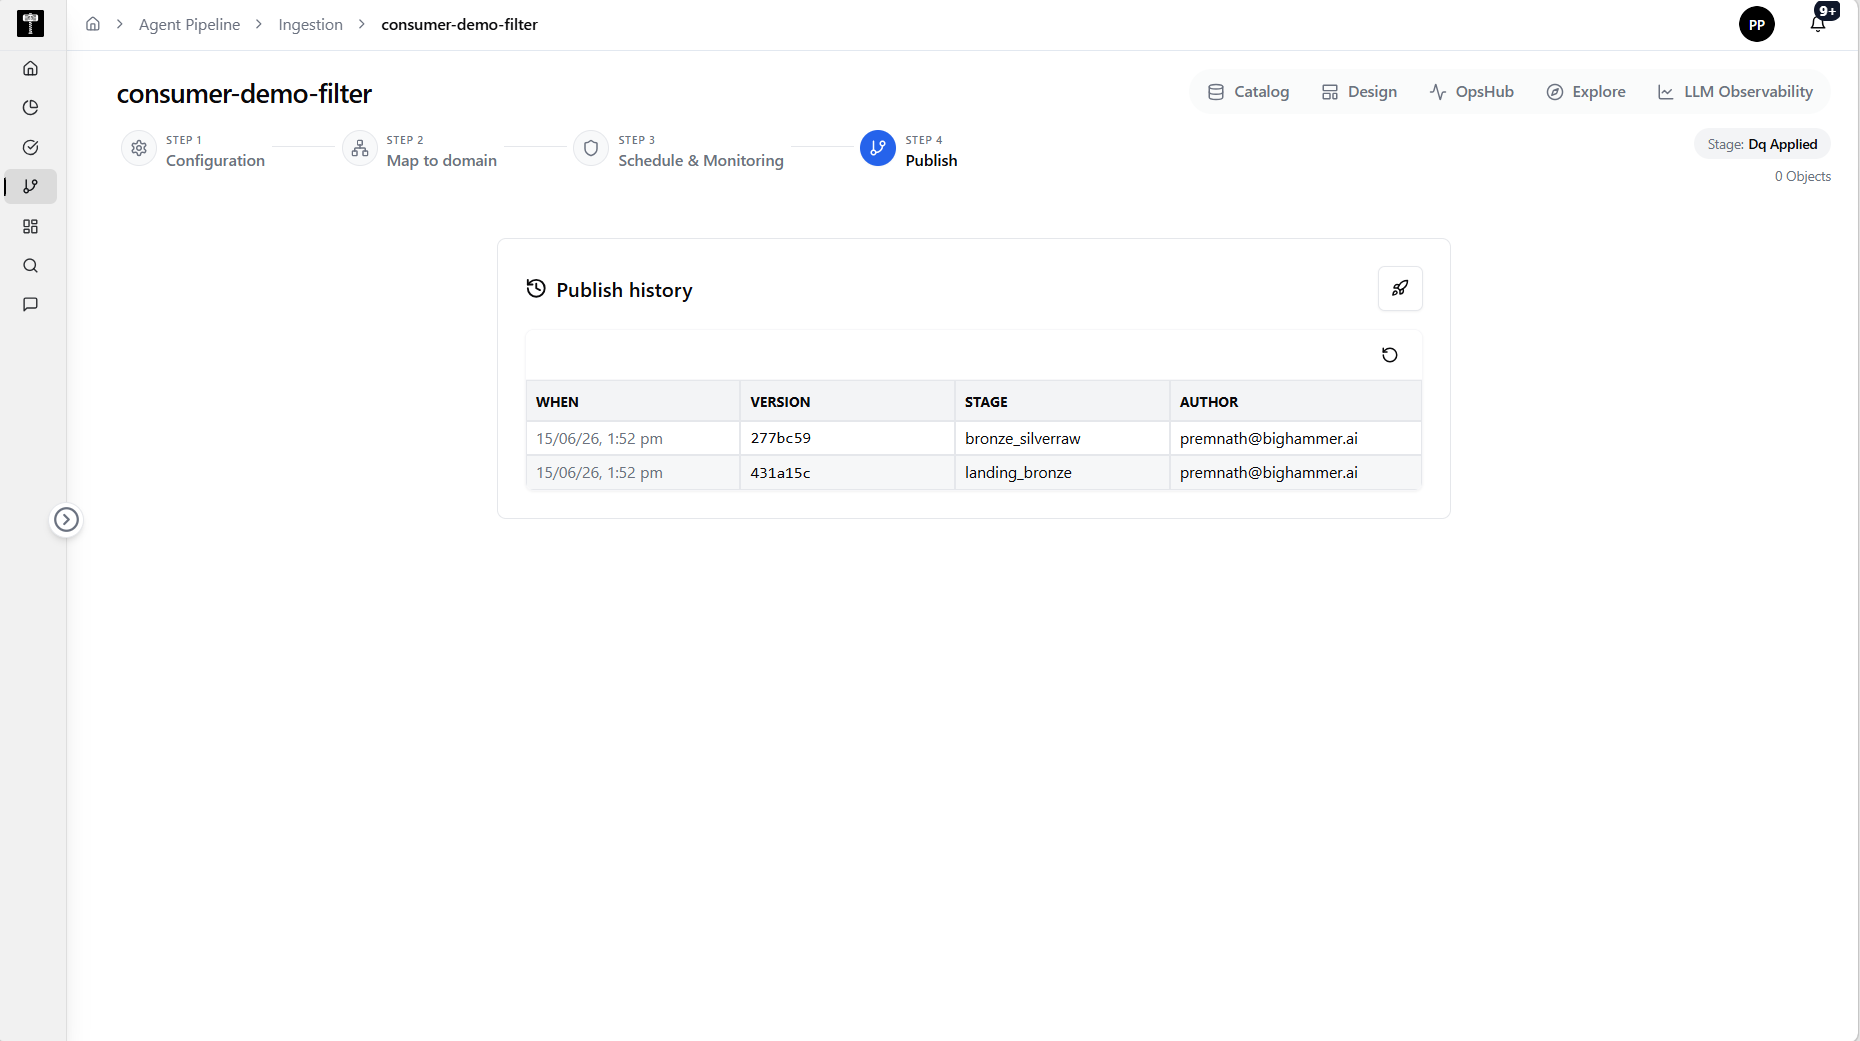
Publish the pipeline
- Review the pipeline summary to confirm all settings are correct.
- Select Publish to activate the pipeline.
- The status changes from Draft to Published.
:::caution Changes after publish After publishing, certain configuration changes such as source connection or load strategy may require republishing. Review the warning indicators before making edits. :::
The ingestion pipeline is now active and will run according to the configured schedule. You can view its execution status, logs, and history from the View ingestion page or the Pipeline Dashboard.